
Close your eyes and listen to the sound of a fresh sheet of heavy-gauge watercolor paper sliding across a birch workbench. It is a crisp, rhythmic rasp that speaks of high cellulose density and internal sizing. When we talk about Integrated Crafting For Kids, we are not just talking about finger paints and glitter glue. We are discussing the visceral, tactile education of understanding how a material resists or yields to the human hand. It is about teaching our children that a piece of kiln-dried maple has a grain direction that dictates the path of a chisel, or that a 20-pound bond paper has a specific tensile strength that fails under excessive moisture. I want my kids to feel the difference between the cold, dense weight of solid brass and the hollow, lightweight ring of anodized aluminum. This is about building a sensory library. By engaging with the physical properties of our world, children develop a profound respect for the resources they consume. They learn that making is a conversation between the maker and the medium.
THE STUDIO KIT
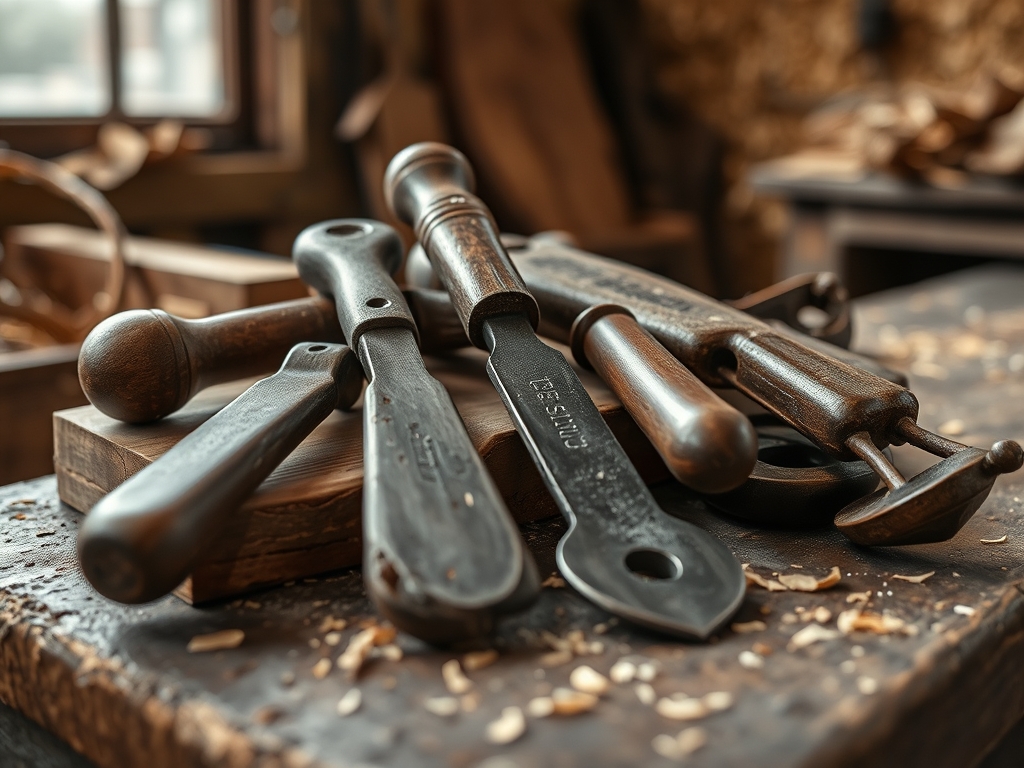
To master the art of integrated making, your studio needs more than just basic supplies; it requires precision instruments that provide haptic feedback. We start with a **stainless steel cork-backed ruler** to prevent slippage during high-pressure cuts. For marking, skip the dull crayons and reach for a **0.5mm mechanical pencil** or a **fine-point awl** to scribe lines directly into the surface. The star of our kit is the **bone folder**, a tool made of polished cattle bone used to burnish folds and create crisp, professional creases without tearing the paper fibers. We also utilize **calipers** to measure the thickness of our substrates, ensuring our joinery is accurate to the millimeter.
For materials, we focus on high-density fiberboard (HDF) for structural bases and vegetable-tanned leather for tactile elements. If you cannot source these, look for Material Substitutions: use heavy chipboard instead of HDF, or thick wool felt instead of leather. The goal is to maintain the same structural integrity and resistance. Always keep a self-healing cutting mat on the table to protect your blades and provide a consistent friction coefficient for your work.
THE TEMPO
The "Maker's Rhythm" is a psychological state where the passage of time aligns with the physical requirements of the material. In our studio, we break this down into three distinct phases. The first is the Mapping Phase, which takes roughly thirty minutes. This is where we measure twice and cut once, focusing on the geometry of the piece. The second is the Execution Phase, lasting two to three hours. This is the heavy lifting where we saw, sand, and assemble. Finally, we have the Curing Phase. This is the hardest lesson for kids: waiting for adhesives to achieve maximum bond strength. Depending on the polymer used, this can take anywhere from four to twenty-four hours. Respecting the tempo means understanding that you cannot rush chemistry.
THE CORE METHOD
1. Scribing the Foundation
Before any cut is made, we must scribe our lines. Using an awl, we create a physical groove in the material. This creates a "track" for our cutting tools, reducing the likelihood of a slip.
Mastery Tip: This utilizes mechanical displacement. By compressing the surface fibers before cutting, you increase the local density of the material, which helps the blade stay on path through the path of least resistance.
2. The Controlled Shear
When using a rotary cutter or a utility knife, the angle of the blade is everything. We hold the tool at a consistent 45-degree angle to the surface to ensure a clean, vertical edge.
Mastery Tip: This is about force distribution. A sharp blade at a consistent angle minimizes "burring" on the edge, which occurs when the material is torn rather than sliced at a molecular level.
3. Gradated Sanding
We never jump straight to the finish. We start with a coarse 80-grit sandpaper to remove bulk and move sequentially to 220-grit for a smooth finish.
Mastery Tip: This process is called abrasive leveling. Each successive grit removes the scratches left by the previous one. If you skip a step, the microscopic valleys in the material will remain visible under a finish.
4. Adhesive Application and Clamping
We apply a thin, even layer of PVA glue and use spring clamps to hold the pieces together. The goal is a "starve-free" joint where the glue penetrates the pores of both surfaces.
Mastery Tip: This relies on capillary action. The glue is drawn into the porous structure of the material. Clamping pressure ensures the thinnest possible glue line, which is actually stronger than a thick, gloppy layer of adhesive.
THE TECHNICAL LEDGER
Maintenance is the hallmark of a professional. To ensure longevity, all wooden components should be treated with a food-grade mineral oil to prevent desiccation. Metal components require a light coat of wax to inhibit oxidation. If you are using Sustainable Variations, such as bamboo or recycled HDPE plastic, remember that these materials have different thermal expansion rates than traditional hardwoods.
The Correction: Common Pitfalls
- The Ragged Edge: Caused by a dull blade. Fix: Snap off a new segment of your utility blade every five to ten cuts to maintain peak sharpness.
- Adhesive Failure: Caused by "clamped starvation" or oily surfaces. Fix: Wipe surfaces with isopropyl alcohol before gluing to remove natural oils.
- Warping: Caused by uneven moisture absorption. Fix: Always finish both sides of a porous material (like wood or paper) to ensure even tension as the finish dries.
For Studio Organization, store your flat materials horizontally in a climate-controlled environment. Vertical storage leads to "bowing" over time due to gravitational stress on the internal fibers. Keep your precision tools in a lined drawer to prevent the metal-on-metal contact that dulls fine edges.
THE FINAL REVEAL
There is nothing quite like the moment a child holds a finished piece and realizes it feels "real." It has heft; it has a smooth, burnished finish; it has the structural integrity of something built to last a lifetime. When we practice Integrated Crafting For Kids, we move away from the "disposable" culture of modern toys. The finished project is a testament to their patience and their growing mastery over the physical world. Look at the way the light catches the sanded edges and how the joints fit together with zero daylight between them. That is not just a craft project; that is engineering.
STUDIO QUESTIONS
Why is grain direction important for kids to learn?
Grain direction determines the strength and flexibility of the material. Cutting with the grain is easier but weaker; cutting across the grain provides structural stability. Understanding this prevents the material from snapping or splintering during the assembly process.
What is the best way to introduce sharp tools?
Start with a high-quality rotary cutter or a small jeweler's saw under direct supervision. Focus on the physics of the tool: explain how the blade works and emphasize that the tool does the work so the hand does not have to.
How do I explain "tensile strength" to a child?
Use a rubber band and a piece of thread. The rubber band has high elasticity; the thread has high tensile strength because it resists stretching until it reaches its breaking point. This helps them choose the right material for different structural needs.
Why does my glue keep failing on plastic?
Most plastics have low surface energy, meaning liquids like glue just bead up instead of soaking in. To fix this, lightly abrade the surface with sandpaper to create "mechanical teeth" for the adhesive to grab onto.
What is the benefit of using a bone folder?
A bone folder allows you to create a permanent "memory" in paper or leather fibers without damaging the surface. It compresses the material at the fold line, ensuring the piece stays flat and professional rather than springing back open.

