
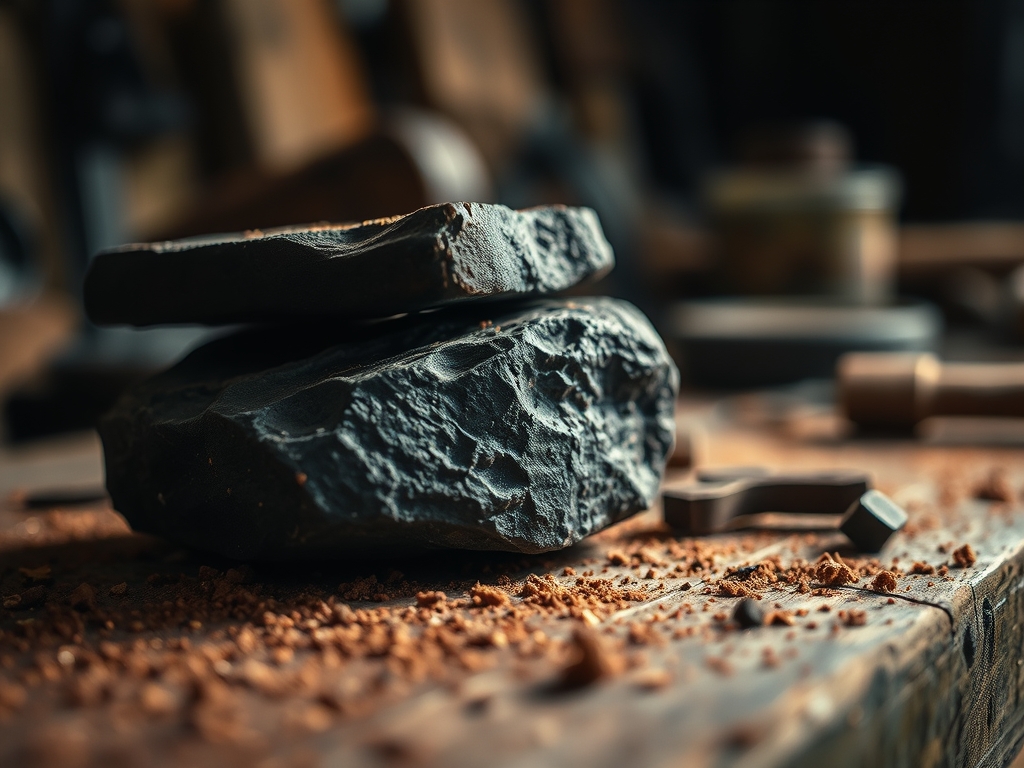
Imagine the weight of a cool, river-smoothed basalt palm stone or the sharp, geometric layering of a metamorphic plate. There is a primal satisfaction in Foraging For Stones and Slate that modern mass production simply cannot replicate. When you hold a raw specimen, you are feeling millions of years of tectonic pressure and thermal cycling compressed into a single, tactile object. My studio floor is currently a mosaic of local finds, ranging from high-density granite to brittle, sedimentary shales. The goal is to transform these rugged fragments into functional art that protects your mahogany surfaces from condensation. We are looking for pieces with a high Mohs hardness rating to ensure they do not crumble under the weight of a heavy mug. You can feel the difference in grain density just by tapping two stones together; a sharp, high-pitched "clink" indicates a tight crystalline structure, while a dull "thud" suggests a porous, air-trapped composition that might crack during the cutting phase. We are hunting for the perfect balance of aesthetic grit and structural integrity.
THE STUDIO KIT
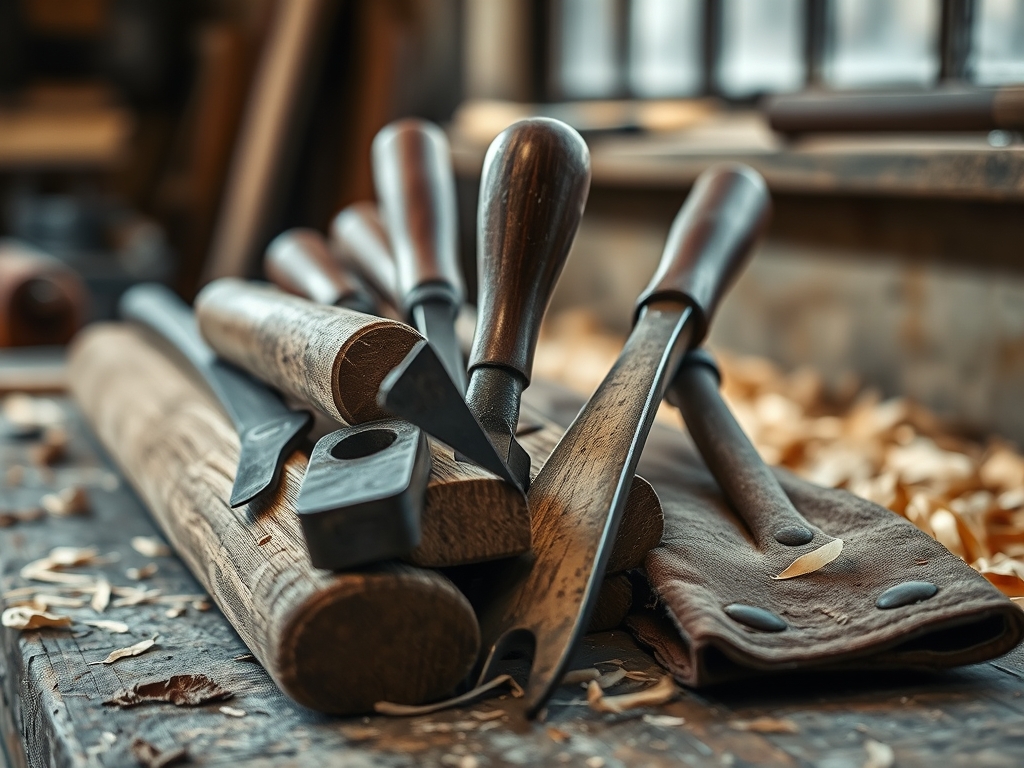
To turn raw earth into refined tabletop accessories, you need a kit that respects the tensile strength of your medium. This is not a "glue and glitter" project; this is a lapidary-lite endeavor that requires precision.
- Diamond-Blade Wet Saw or Oscillating Tool: Essential for making clean, perpendicular cuts through hard silicates without generating excessive heat.
- Digital Calipers: Used to measure the gauge of each slice to ensure a uniform set. We are aiming for a thickness of 8mm to 12mm.
- Silicon Carbide Sandpaper: Ranging from 80 grit for shaping to 3000 grit for a mirror-like burnish.
- Food-Grade Mineral Oil or Stone Sealer: To saturate the pores and enhance the natural color saturation.
- Adhesive-Backed Cork or Neoprene: To provide a soft, non-slip base that prevents the stone from scratching furniture.
- Jeweler's Saw: For fine detailing or notched edges if you are working with softer shales.
Material Substitutions: If you cannot find slate, look for flagstone or even discarded ceramic roof tiles. These offer similar porosity and flat-plane characteristics. If a wet saw is unavailable, you can use a hammer and a wide-blade masonry chisel to "score and snap" slate along its natural cleavage planes, though this results in a more rustic, uneven edge.
THE TEMPO
The "Maker's Rhythm" for stone work is slow and deliberate. You cannot rush the thermal dynamics of friction. Plan for a total of six hours of active work spread over two days to allow for proper drying and sealing.
- The Hunt (1-2 Hours): Scouring creek beds or rocky outcrops. This is the most "analog" part of the process.
- The Prep (1 Hour): Scrubbing, drying, and sorting stones by thickness and mineral type.
- The Cut (1.5 Hours): Precise slicing and initial shaping. This requires the most focus to maintain structural integrity.
- The Refinement (2 Hours): The repetitive, meditative motion of wet sanding.
- The Cure (Overnight): Allowing sealants to fully penetrate the interstitial spaces of the stone.
THE CORE METHOD
1. Grading and Squaring the Raw Stock
Before the first cut, use your calipers to find the flattest face of your stone. If you are working with slate, identify the foliation planes where the rock naturally wants to split. Mark your cut lines using a wax pencil, ensuring you avoid any visible hairline fractures that could lead to catastrophic failure under the heat of a coffee cup.
Mastery Tip: Observe the capillary action when you wet the stone. If water disappears instantly, the stone is highly porous and will require more sealant later. If it beads, you are working with a high-density material like quartz or basalt.
2. Executing the Primary Cut
Using your wet saw, align the blade with your wax mark. Apply steady, even pressure. Do not force the stone through the blade; let the diamond grit erode the material at its own pace. This prevents thermal shock, which can cause the stone to shatter mid-cut. Keep a constant stream of water on the contact point to lubricate and cool the edge.
Mastery Tip: Maintaining a consistent feed rate is vital. If the blade starts to "scream" or change pitch, you are pushing too hard, which risks micro-fracturing the internal crystalline lattice of the stone.
3. Edge Profiling and Beveling
Once you have your square or circular blank, the edges will be dangerously sharp. Use an oscillating tool with a diamond burr or 80-grit sandpaper to knock down the "burr" on the top edge. Create a slight 45-degree bevel. This not only makes the coaster ergonomic to pick up but also prevents the edges from chipping if the coasters clink together.
Mastery Tip: This process utilizes abrasive wear physics. By removing the sharpest points of the edge, you redistribute potential impact force across a wider surface area, significantly increasing the coaster's durability.
4. The Graduated Polishing Sequence
Transition through your sandpaper grits. Start with 200 to remove saw marks, then jump to 800, 1500, and finally 3000. Use water at every stage. You will feel the surface transition from a "chalky" texture to a silk-like finish. The final 3000-grit pass is what creates that professional, high-end "glow" without the need for artificial resins.
Mastery Tip: The goal here is to reduce the surface roughness (Ra) to a sub-micron level. As the scratches become smaller than the wavelength of light, the surface begins to reflect rather than scatter, creating a natural luster.
5. Sealing and Backing
Dry the stones completely in a warm, low-humidity environment. Apply your mineral oil or stone sealer using a lint-free cloth. Let it sit for twenty minutes, then buff away the excess. Finally, apply your cork backing. Ensure the adhesive is centered to maintain the balance and center of gravity.
Mastery Tip: The sealer works via hydrophobic impregnation. It fills the microscopic voids in the stone, preventing liquids (like red wine or condensation) from leaching into the material and causing permanent stains.
THE TECHNICAL LEDGER
Maintenance & Longevity
To keep your hand-foraged coasters in peak condition, avoid the dishwasher at all costs. The high-alkaline detergents and intense heat cycles will strip the oils and can cause delamination in slate. Simply wipe with a damp cloth and re-apply a thin coat of mineral oil once a year to maintain the color depth.
Material Variations
- Sustainable: Use reclaimed slate shingles from old roofing projects.
- Recycled: Look for "off-cut" scraps at local granite countertop fabricators.
- Premium: Seek out "Lepidolite" or "Tiger's Eye" rough chunks for coasters with iridescent properties.
The Correction: Common Pitfalls
- The Fracture: If a stone snaps during cutting, the cause is usually an internal fault line. Fix: Use a UV-curing resin to "stitch" the pieces back together for a Kintsugi-style aesthetic.
- The Wobble: If the coaster sits unevenly, your backing is likely the culprit. Fix: Use a bone folder to press the cork firmly and evenly, or sand the bottom of the stone further to achieve perfect flatness.
- The Fog: If the stone looks cloudy after sealing, moisture was trapped inside. Fix: Strip the sealer with a mild solvent, dry the stone in a 150-degree oven for an hour, and re-seal.
Studio Organization
Store your stone blanks vertically in a slotted rack to prevent surface-to-surface scratching. Keep your diamond blades submerged in a light oil or dry environment to prevent oxidation of the metal matrix.
THE FINAL REVEAL
There is nothing quite like the weight of a finished, polished stone coaster in your hand. It feels substantial, permanent, and deeply connected to the landscape you explored to find it. The way the light catches the mica flecks in the slate or the deep feldspar veins in the granite makes every drink feel like a special occasion. You have taken a piece of the "wild" and refined it through the laws of physics and a bit of elbow grease. These are not just coasters; they are conversation starters that carry the literal weight of the earth.
STUDIO QUESTIONS
What is the best stone for beginners?
Slate is the ideal starting material. Its natural foliation allows it to split into flat sheets easily, requiring less heavy-duty sawing than granite or quartz while still offering excellent durability and a classic aesthetic.
How do I prevent the stone from staining?
Apply a high-quality penetrating sealer. Unlike topical coatings, these soak into the stone's pores to create a chemical barrier against moisture and oils without changing the natural tactile feel of the rock surface.
Can I use a regular wood saw?
No. Standard steel teeth will dull instantly against the mineral hardness of stone. You must use a diamond-grit blade or a masonry bit, which works by grinding the material rather than tearing it.
Why is my stone cracking when I sand it?
Cracking during sanding usually results from frictional heat. If you sand dry, the temperature rises rapidly, causing localized expansion. Always use water to lubricate the surface and dissipate heat during the polishing stages.
How thick should a stone coaster be?
Aim for a gauge between 8mm and 12mm. Anything thinner than 5mm becomes too brittle and prone to snapping; anything thicker than 15mm becomes unnecessarily heavy and difficult to store in standard coaster holders.

